

Installing the Paytriot plugin is super easy. See steps below:
1: First of all if you already have another version of the Paytriot Woocommerce plugin installed you should take note of the settings. If you don’t then skip to step 3. These are normally found here: WordPress Admin > Woocommerce > Settings > Payments > Paytriot Gateway > Set up
2: Once you have taken note of all the settings (i.e. merchant key, secret key etc.) you should disable the current plugin. You can do this here: WordPress Admin > Plugins > Installed Plugins
3: Once the old plugin is disabled you can install the new plugin here: WordPress Admin > Plugins > Add New

4: On the next screen, select upload plugin.

5: On the next screen. Click ‘Choose file’
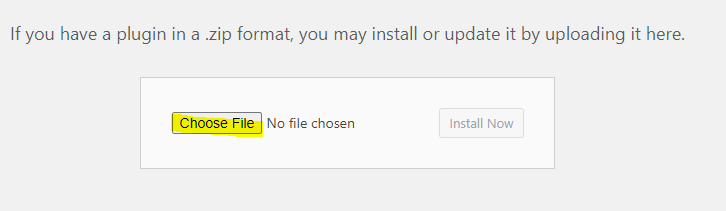
6: Select the plugin file that you downloaded.
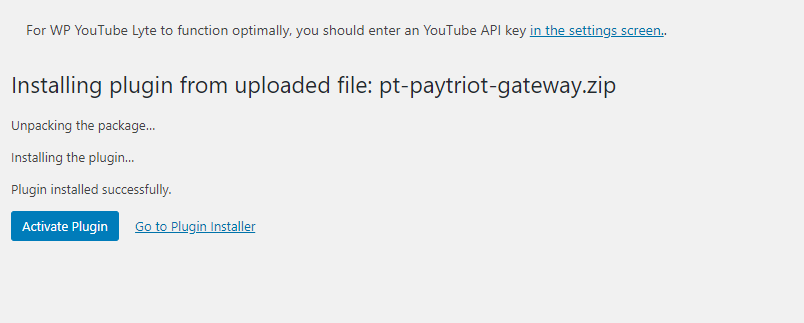
7: On the next screen click ‘Activate Plugin’
8: Once installed click the ‘Settings’ link from the Paytriot plugin entry in the plugins page

9: Enter your settings from Paytriot.
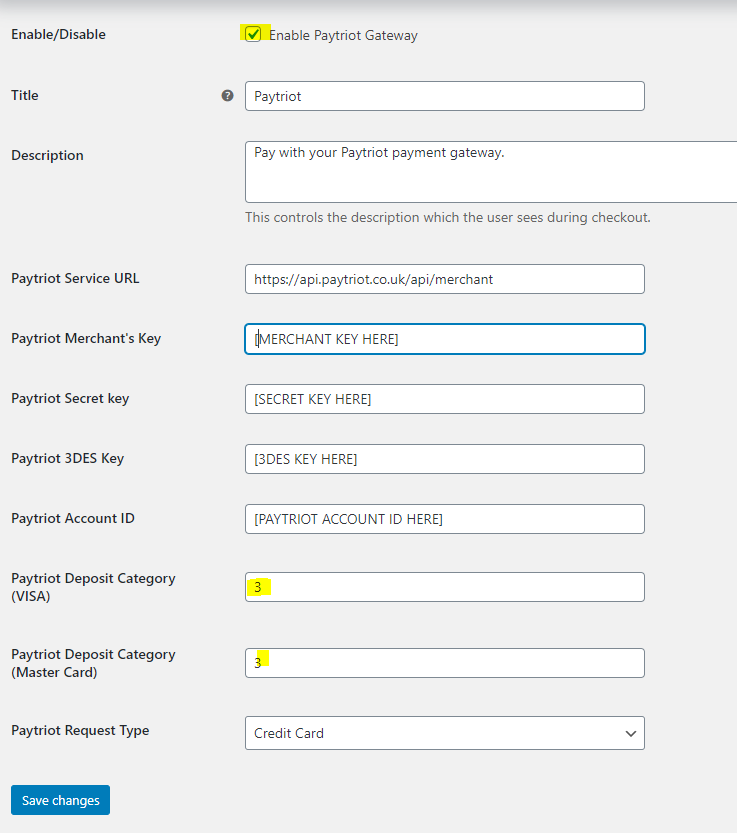
The general settings are below:
Paytriot Service URL: https://api.paytriot.co.uk/api/merchant
Paytriot Deposit Category (VISA): 3
Paytriot Deposit Category (Master Card): 3
Paytriot Request Type: Credit Card
All the other settings are specific to your account and are supplied by Paytriot.